
How to Manage Settings and More ⚙️
Open Cubicon "More" tab. Here you can:
- set up or edit your Business Settings
- manage your Clients and Items
- track Expenses
- add AI Voice Creator to the bottom navigation bar
- manage Account
- In Business Settings, you can:

- add or edit your business details (Logo, Business Name, Contact Info)
- add or delete your signature
- manage your payments: provide or update payment instructions for your clients, and activate online payment options (PayPal)
- preview or change the design of your templates
-
set up automated payment reminders
Automated payment reminders will be sent to your clients via email according to the schedule you set up.
-
Tap Clients and Items.
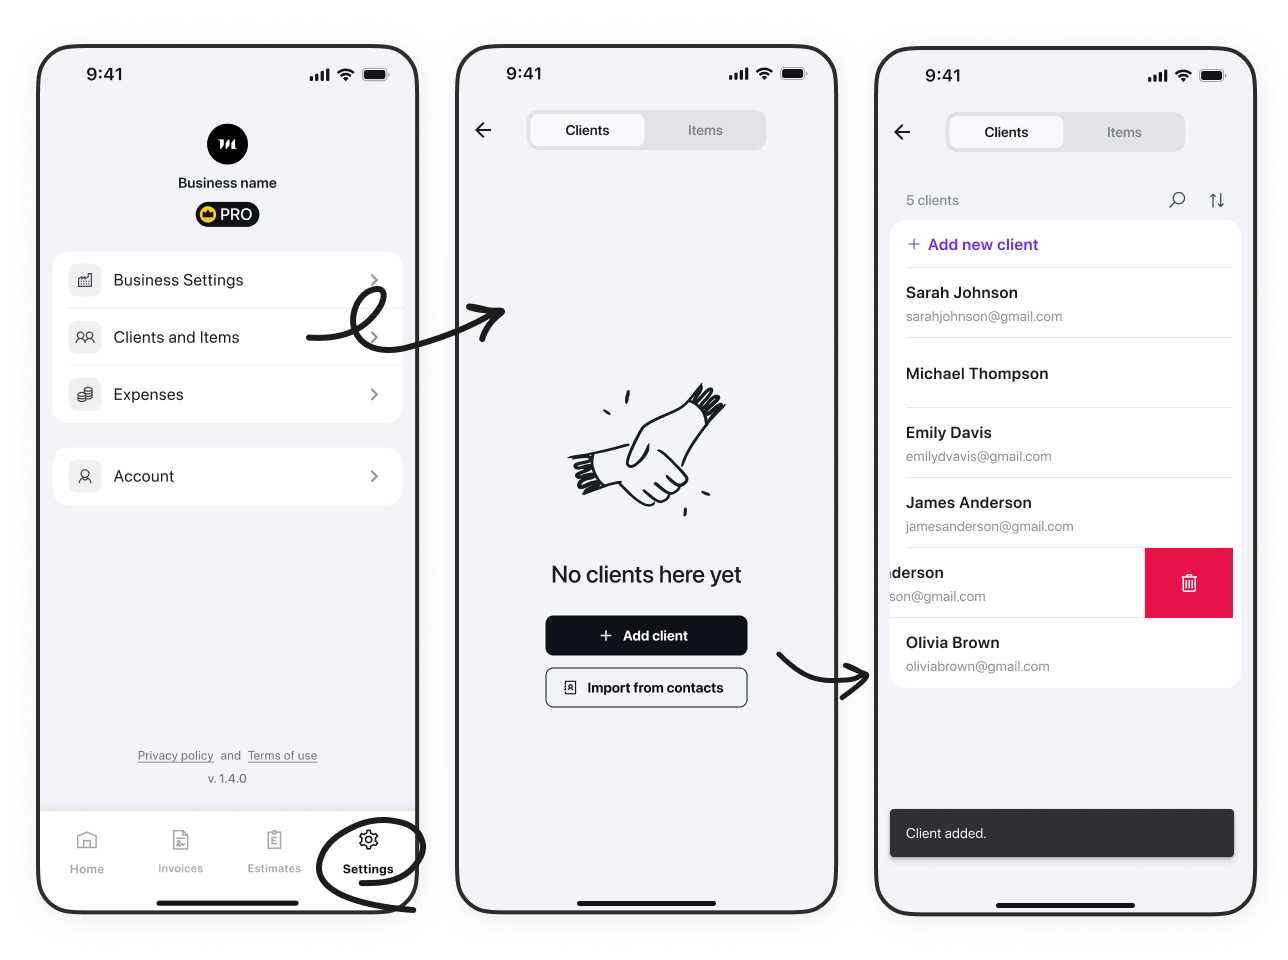
Here you can manage your client list.

-
Tap a client to view the history of your financial interactions.
Tap the three-dot icon to edit client details, export a statement, or download all invoices under their name as a PDF.
You can also contact the client directly from the app interface.
- You can create a new client by tapping +Add new client and filling out the Add client form.
- You can sort clients by name or creation date.
Tap the Items tab, to start managing the item list:
- Tap any item and edit its record.
- Create a new item. Tap +Add new item and fill out the Add item form by entering:
- the name of the product or service you are offering
- its description (optionally)
- its unit of measurement (piece, hour, etc)
- the cost per unit.
-
Tap Expenses to start tracking your business expenses.
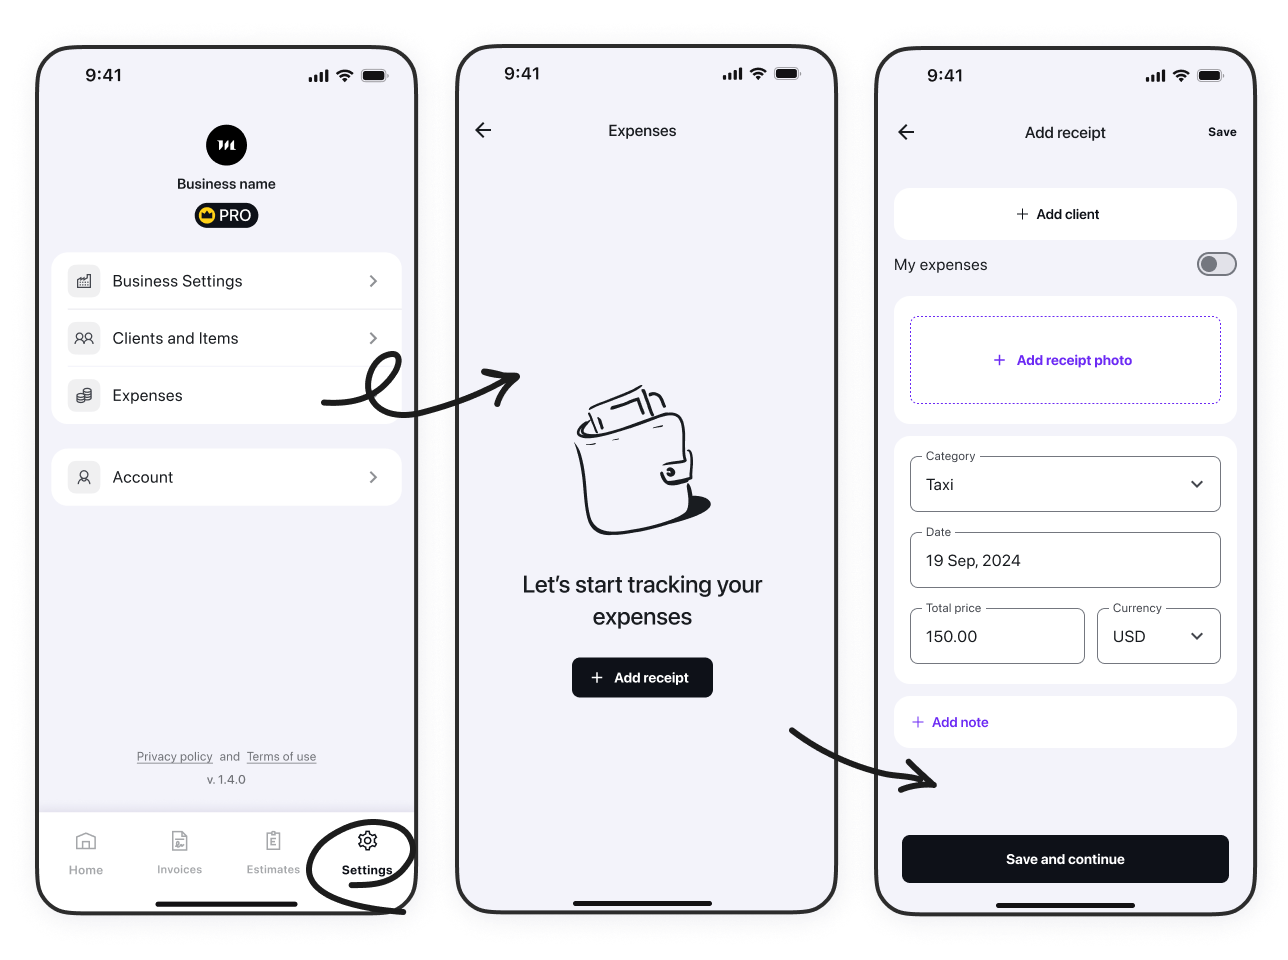
Tap +Add receipt to log a new expense.
Fill out the Add receipt form.

-
If the receipt is related to a client (e.g., supplies purchased for a client's service), tap +Add client and select the client.
In case the client is new, tap +Add new client and enter new client details.
In case the receipt refers to your own business expenses, activate the My expenses toggle.
- Tap +Add receipt photo and upload a photo.
- Categorize your expense by choosing from the dropdown list.
- Enter the total sum of the receipt, and select the currency.
-
Tap +Add note to add any comment to this expense item / receipt.
Tap Save. Your expense receipt has been successfully saved 👍
- In the Details tab you can view the date of the receipt, the business expenses category, and total sum.
- In the Image tab you can view the receipt photo.
- You can send the receipt by email or share as file, as well as edit it.
- Use the top menu to delete the receipt.
- Tap Account to manage your Cubicon account:
- view the email linked to your account
- restore your purchase
- change your password
- configure regional settings: Currency, Time zone, Date format.
- activate dark mode
- log out
- delete your account
Now you're all set to customize your Cubicon experience! Happy invoicing! ✨